Arduino is an open embedded hardware and software platform designed for rapid creativity. It's both a great introduction to embedded programming and a fast track to building all kinds of cool devices like animatronics, robots, fabulous blinky things, animated clothing, games, your own little fabs... you can build what you imagine. Follow along as we learn both embedded programming and basic electronics.
What Does Arduino Do?Arduino was invented by Massimo Banzi, a self-taught electronics guru who has been fascinated by electronics since childhood. Mr. Banzi had what I think of as a dream childhood: endless hours spent dissecting, studying, re-assembling things in creative ways, and testing to destruction. Mr. Banzi designed Arduino to be friendly and flexible to creative people who want to build things, rather than a rigid, overly-technical platform requiring engineering expertise.
The microprocessor revolution has removed a lot of barriers for newcomers, and considerably speeded up the pace of iteration. In the olden days building electronic devices means connecting wires and components, and even small changes were time-consuming hardware changes. Now a lot of electronics functions have moved to software, and changes are done in code.
Arduino is a genuinely interactive platform (not fake interactive like clicking dumb stuff on Web pages) that accepts different types of inputs, and supports all kinds of outputs: motion detector, touchpad, keyboard, audio signals, light, motors... if you can figure out how to connect it you can make it go. It's the ultimate low-cost "what-if" platform: What if I connect these things? What if I boost the power this high? What if I give it these instructions? Mr. Banzi calls it "the art of chance." Figure 1 shows an Arduino Uno; the Arduino boards contain a microprocessor and analog and digital inputs and outputs. There are several different Arduino boards.
You'll find a lot of great documentation online at Arduino and Adafruit Industries, and Mr. Banzi's book Getting Started With Arduino is a must-have.
Packrats Are GoodThe world is over-full of useful garbage: circuit boards, speakers, motors, wiring, enclosures, video screens, you name it, our throwaway society is a do-it-yourselfer's paradise. With some basic skills and knowledge you can recycle and reuse all kinds of electronics components. Tons of devices get chucked into landfills because a five-cent part like a resistor or capacitor failed. As far as I'm concerned this is found money, and a great big wonderful playground. At the least having a box full of old stuff gives you a bunch of nothing-to-lose components for practice and experimentation.
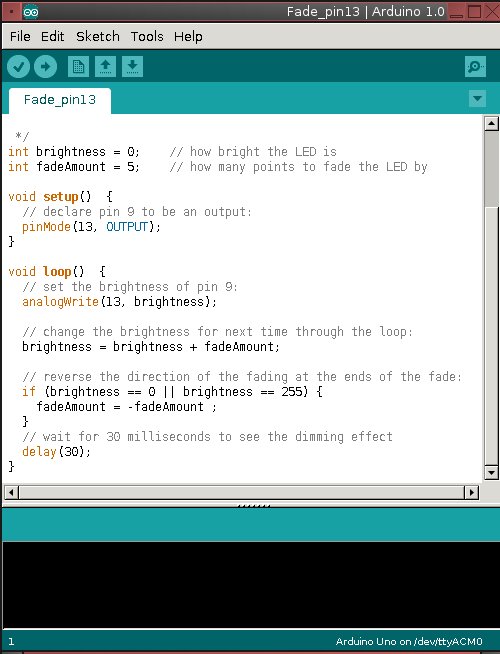
The Arduino IDEThe Arduino integrated development environment (IDE) is a beautiful creation. The Arduino programming language is based on the Processing language, which was designed for creative projects. It looks a lot like C and C++. The IDE compiles and uploads your code to your Arduino board; it is fast and you can make and test a lot of changes in a short time. An Arduino program is called a sketch. See Installing Arduino on Linux for installation instructions.
You will need to know how to solder. It's really not hard to learn how to do it the right way, and the Web is full of good video howtos. It just takes a little practice and decent tools. Get yourself a good variable-heat soldering iron and 60/40 rosin core lead solder, or 63/37. Don't use silver solder unless you know what you're doing, and lead-free solder is junk and won't work right. I use a Weller WLC100 40-Watt soldering station, and I love it. You're dealing with small, delicate components, not brazing plumbing joints, so having the right heat and a little finesse make all the difference.
Another good tool is a lighted magnifier. Don't be all proud and think your eyesight is too awesome for a little help; it's better to see what you're doing.
Adafruit industries sells all kinds of Arduino gear, and has a lot of great tutorials. I recommend starting with these hardware bundles because they come with enough parts for several projects:
Adafruit ARDX – v1.3 Experimentation Kit for Arduino This has an Arduino board, solderless breadboard, wires, resistors, blinky LEDs, USB cable, a little motor, experimenter's guide, and a bunch more goodies. $85.00.9-volt power supply. Seven bucks. You could use batteries, but batteries lose strength as they age, so you don't get a steady voltage.Tool kit that includes an adjustable-temperature soldering iron, digital multimeter, cutters and strippers, solder, vise, and a power supply. $100.Other good accessories are an anti-static mat and a wrist grounding strap. These little electronics are pretty robust and don't seem bothered by static electricity, but it's cheap insurance in a high-static environment. Check out the Shields page for more neat stuff like the Wave audio shield for adding sound effects to an Arduino project, a touchscreen, a chip programmer, and LED matrix boards.
Essential Electric TerminologyLet's talk about volts (V), current (I), and resistance (r) because there is much confusion about these. Volts are measured in voltage, current is measured in amps, and resistance is measured in ohms. Electricity is often compared to water because they behave similarly: voltage is like water pressure, current is like flow rate, and resistance is akin to pipe diameter. If you increase the voltage you also increase current. A bigger pipe allows more current. If you decrease the pipe size then you increase resistance.
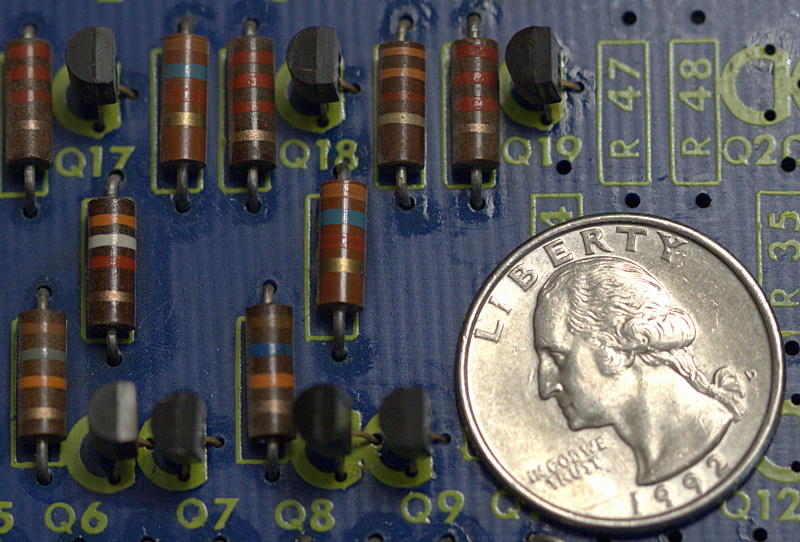
 Talk is cheap, so take a look at Figure 3. This is an old circuit board from a washing machine. See the stripey things? Those are resistors. All circuit boards have gobs of resistors, because these control how much current flows over each circuit. The power supply always pushes out more power than the individual circuits can handle, because it has to supply multiple circuits. So there are resistors on each circuit to throttle down the current to where it can safely handle it.
Again, there is a good water analogy — out here in my little piece of the world we use irrigation ditches. The output from the ditch is too much for a single row of plants, because its purpose is to supply multiple rows of plants with water. So we have systems of dams and diverters to restrict and guide the flow.
In your electronic adventures you're going to be calculating resistor sizes for your circuits, using the formula R (resistance) = V (voltage) / I (current). This is known as Ohm's Law, named for physicist Georg Ohm who figured out all kinds of neat things and described them in math for us to use. There are nice online calculators, so don't worry about getting it right all by yourself.
That's all for now. In the next tutorial, we'll learn about loading and editing sketches, and making your Arduino board do stuff.
]]>
No comments:
Post a Comment