Custom Search
Showing posts with label Weekend. Show all posts

Wednesday, March 21, 2012

Weekend Project: Take a Look at Cron Replacement Whenjobs


The cron scheduler has been a useful tool for Linux and Unix admins for decades, but it just might be time to retire cron in favor of a more modern design. One replacement, still in heavy development, is whenjobs. This weekend, let's take a look at whenjobs and see what the future of scheduling on Linux might look like.


The default cron version for most Linux distributions these days is derived from Paul Vixie's cron. On Ubuntu, you'll find the Vixie/ISC version of cron. On Fedora and Red Hat releases you'll find cronie, which was forked from Vixie cron in 2007.


You can also find variants like fcron, but none of the variants that are around today have really advanced cron very much. You can't tell cron "when this happens, run this job." For instance, if you want to be notified when you start to run low on disk space, or if the load on a machine is above a certain threshold. You could write scripts that check those things, and then run them frequently. But it'd be better if you could just count on the scheduler to do that for you.


There's also the less than friendly formatting to cron. When I've worked in hosting, I found plenty of cron jobs that were either running too often because the owner mis-formatted the time fields, or that didn't run as often as expected for the same reason. Back up jobs that should have been running daily were running once a month. Oops.


Getting whenjobs


Red Hat's Richard W.M. Jones has been working on whenjobs as "a powerful but simple cron replacement." The most recent source tarball is 0.5, so we expect that it's starting to be usable but still has some bugs. (And it does, more on that in a moment.)


A slight word of warning, you're probably going to need a lot of dependencies to build whenjobs on your own. It doesn't look to be packaged upstream by any of the distros, including Fedora. It also requires a few newer packages that you're not going to find in Fedora 16. I ended up trying it out on Fedora 17, and installing a slew of OCaml packages.


To get whenjobs, you can either grab the most recent tarball or go for the most recent code out of the git repository. You can get the latest by using git clone git://git.annexia.org/git/whenjobs.git but I'd recommend going with the tarball.


Jones recommends just building whenjobs with rpmbuild -ta whenjobs-*.tar.gz. (Replace the * with the version you have, of course.) If you have all the dependencies needed, you should wind up with an RPM that you can install after it's done compiling.


Using whenjobs


To use whenjobs, you'll need to start the daemon. Note that you don't start this as root, you want to run it as your normal user.


According to the documentation, you want to start the daemon with whenjobs --daemon, but Jones tells me this isn't implemented just yet. Instead, you'll want to run /usr/sbin/whenjobsd to start the daemon. You can verify that it's running by using pgrep whenjobsd. (Eventually you'll be able to use whenjobs --daemon-status.)


To start adding jobs to your queue, use whenjobs -e. This should drop you into your jobs script and let you start adding jobs. The format is markedly different than cron's, so let's look at what we've got from the sample whenjobs scripts.

every 10 minutes :<< # Get free blocks in /home free=`stat -f -c %b /home` # Set the variable 'free_space' whenjobs --type int --set free_space $free>>when changes free_space && free_space < 100000 :<< mail -s "ALERT: only $free_space blocks left on /home" $LOGNAME >

Jobs start with a periodic statement or a when statement. If you want a job to run at selected intervals no matter what, use the every period statement. The period can be something like every day or every 2 weeks or even every 2 millenia. I think Jones is being a wee bit optimistic with that one, but on the plus side – if whenjobs is still in use 1,000 years from now and it doesn't run your job, Jones probably won't have to deal with the bug report...


Otherwise, you can use the when statement to evaluate an expression, and then perform a job if the statement is true. See the man page online for all of the possible when statements that are supported.


As you can see, you can also set variables for whenjobs. It accepts several types of variables, such as ints, strings, booleans, and so forth. You can see and set variables using whenjobs --variables or whenjobs --set variable.


The script for the job is placed between brackets (<< >>). Here you can use normal shell scripts. The scripts are evaluated with the $SHELL variable or /bin/sh if that's not set. Presumably you could use tcsh or zsh instead if you prefer those.


If you want to see the jobs script without having to pop it open for editing, use whenjobs -l. You can use whenjobs --jobs to see jobs that are actually running. If you need to cancel one, use whenjobs --cancel serial where the serial number is the one given by the whenjobs --jobs command.


A cron Replacement?


I don't think whenjobs is quite ready to be rolled out as a cron replacement just yet, but it's definitely worth taking a look at if you've ever felt frustrated with cron's limitations. It will probably be a while before whenjobs starts making its way into the major distros, but if you're feeling a little adventurous, why not start working with it this weekend.


This post was made using the Auto Blogging Software from WebMagnates.org This line will not appear when posts are made after activating the software to full version.

Weekend Project: Take a Look at Wine 1.4


The Wine project has released stable version 1.4 of its Windows-compatibility service for Linux (and other non-Microsoft OSes), the culmination of 20 months' worth of development. The new release adds a host of new features, including new graphics, video, and audio subsystems, tighter integration with existing Linux, and improvements to 3D, font support, and scripting languages.


In the old days, WINE was capitalized as an homage to its ultimate goal: Wine Is Not an Emulator. Rather, it is an application framework that provides the Windows APIs on other OSes — primarily Linux and Mac OS X, but others, too (including, if you so desire, other versions of Windows). The point is that you can run applications compiled for Windows directly in another OS. Unlike virtual machine solutions, you do not also have to purchase a copy of Windows to do so, and the lower overhead of a VM-free environment gives better performance, too.


Version 1.4 was released on March 7, about two years since the previous major update, Wine 1.2. Microsoft did not roll out a new version of Windows in the interim, so understandably the Wine project has had time to undertake plenty of changes of its own.


New: Multimedia, Input, and System Integration


The biggest change is a true "device independent bitmaps" (DIB) graphics engine. This engine performs software graphics rendering for the Windows Graphics Device Interface (GDI) API, which Wine has never supported before. Note, however, that Windows offers lots of different graphics APIs. Wine already had support for the better-known Direct3D and DirectDraw APIs, which also received a speedup. Still, the result of the new engine is considerably faster rendering for a variety of applications. The DIB code was actually developed by Transgaming, one of the commercial vendors that makes use of Wine in its own product line.


Windows also offers multiple audio APIs, the newest of which is MMDevAPI, which was introduced in Windows Vista. Wine 1.4 sports a rewritten audio architecture that implements this new API, and supports several audio back-ends: ALSA, CoreAudio, and OSS 4. Support for older back-ends like OSS 3 was dropped, as was support for AudioIO and JACK. PulseAudio, which is now the default in many desktop Linux systems, is supported through its existing ALSA compatibility. The project would like to restore JACK functionality, but it needs developers to help do so; similarly there is a side project to write direct support for PulseAudio, but it has yet to make it into the mainline code base.


Wine also uses the GStreamer multimedia engine for audio and video decoding, which gives Wine apps automatic support for every file format known to GStreamer. There are X improvements in 1.4 as well, most importantly support for XInput 2. XI2 should fix cursor-movement problems with full-screen Windows programs, as well as support animated cursors and mapping joystick actions. Finally, the new release uses XRender to speed up rendering gradients.


The new release also better integrates the Windows "system tray" (which many applications running under Wine will expect to exist) with Linux system trays, and even supports pop-up notifications. Wine also has support for applications that use several additional programming languages (including VBScript and JavaScript bytcodes), plus support for both reading and creating .CAB "cabinet" archives and .MSI installers. There is also a built-in Gecko-based HTML rendering engine (which should make HTML-and-CSS-based programs more reliable than the Internet Explorer-based renderer found in Windows...).


Enhanced: 3D, Text, Printing, and Installing


As mentioned above, Wine's support for Direct3D and DirectDraw both received enhancement for 1.4. OpenGL is used as the back-end for both; a more detailed look at the capabilities and benchmarks can be found on Phoronix.


The font subsystem received a substantial make-over for 1.4, too. The big news is full support for bi-directional text (including shifting the location of menus, dialog box contents, and other UI elements when using right-to-left text), and full support for vertical text (such as Japanese). Rotated text is also supported, and the rendering engine is improved.


The project claims full support for Unicode 6.0's writing systems, although that definitely does not mean that every language in Unicode can be used in Wine. However, there have been significant improvements to the localization effort — more locales are supported, and every UI resource (from strings to dialogs to menu entries) is now in a gettext .po file. So if your language is not supported yet, now is the time to get busy translating!


Printing improvements include directly accessing CUPS as the printing system (previous versions of Wine piped print jobs through lpr) and a revamped PostScript interpreter. The software installer has also been beefed up; it can now install patch-sets (which are very important for applying security updates) and roll-back previous installations. Considering that most Wine users deploy the framework for a smallish set of specific applications, this installer functionality is very handy.


Finally, the new release adds some "experimental" features that not everyone will find to be their cup of tea, but show promise in the long run. First, there is support for some new C++ classes from Microsoft, as well as expanded XML support, and Wine's first implementation of OpenCL (which allows developers to write code that runs on both CPUs and GPUs). Wine also compiles on the ARM architecture for the first time. Windows is not a major player on ARM, but the tablet version of Windows 8 is poised to make a push on ARM this year, so having Wine ready is an important step for the project.


Application Support, Caveats, and Where We Go Next


Naturally enough, Wine for ARM is not as thoroughly tested as Wine on x86. But the new release does still support many more applications than did Wine 1.2. You can find the complete list on the Wine app database — just be aware that individual user reports are the source of most of the compatibility information. It is not as simple as running a static test to see whether or not application X is supported. That said, one of the major bullet points of Wine 1.4 is robust support for Microsoft Office 2010, so if you run Wine to ensure document compatibility with Windows-based friends, you are in good hands.


There are two caveats to be noted with this release. First, although ALSA-over-PulseAudio is a supported audio back-end (and indeed is probably the most common configuration), you should check your version numbers. Some users have reported iffy sound behavior when running pre-1.0 PulseAudio and pre-1.0.25 alsa-plugins.


Second, although standard hardware devices like keyboards, mice, and external peripherals work fine, Wine still does not have support for installing and using Windows USB drivers. This only applies to unusual hardware that requires a separately-installed Windows driver, so it probably does not affect you, but be forewarned. On the other hand, if you have a weird barcode scanner or infrared USB laser that you must use with Windows drivers, there is an external patch set available.


On the same front, if the application you need Wine support for is causing problems, there are some external tools available that help you locate and install add-ons to round out the experience. Many of these add-on options are not free software, so they cannot be shipped with Wine itself, but if you are in dire straits, you might want to check out PlayOnLinux and WineTricks.


Interestingly enough, openSUSE community manager Jos Poortvliet just published a detailed report on using Wine for gaming, in which he discusses both add-on tools. Primarily, however, the emphasis is on how well Wine works on a modern Linux distribution, and the verdict is pretty good. Considering that 27 of the top 30 entries in the Wine compatibility matrix are games, providing a good experience is critical. Although there are probably some people who use Windows for other tasks, too, if you know where to look.


This post was made using the Auto Blogging Software from WebMagnates.org This line will not appear when posts are made after activating the software to full version.

Sunday, March 11, 2012

Weekend Project: Take a Look at Cron Replacement Whenjobs

The cron scheduler has been a useful tool for Linux and Unix admins for decades, but it just might be time to retire cron in favor of a more modern design. One replacement, still in heavy development, is whenjobs. This weekend, let's take a look at whenjobs and see what the future of scheduling on Linux might look like.

The cron scheduler has been a useful tool for Linux and Unix admins for decades, but it just might be time to retire cron in favor of a more modern design. One replacement, still in heavy development, is whenjobs. This weekend, let's take a look at whenjobs and see what the future of scheduling on Linux might look like.

The default cron version for most Linux distributions these days is derived from Paul Vixie's cron. On Ubuntu, you'll find the Vixie/ISC version of cron. On Fedora and Red Hat releases you'll find cronie, which was forked from Vixie cron in 2007.

You can also find variants like fcron, but none of the variants that are around today have really advanced cron very much. You can't tell cron "when this happens, run this job." For instance, if you want to be notified when you start to run low on disk space, or if the load on a machine is above a certain threshold. You could write scripts that check those things, and then run them frequently. But it'd be better if you could just count on the scheduler to do that for you.

There's also the less than friendly formatting to cron. When I've worked in hosting, I found plenty of cron jobs that were either running too often because the owner mis-formatted the time fields, or that didn't run as often as expected for the same reason. Back up jobs that should have been running daily were running once a month. Oops.

Getting whenjobs

Red Hat's Richard W.M. Jones has been working on whenjobs as "a powerful but simple cron replacement." The most recent source tarball is 0.5, so we expect that it's starting to be usable but still has some bugs. (And it does, more on that in a moment.)

A slight word of warning, you're probably going to need a lot of dependencies to build whenjobs on your own. It doesn't look to be packaged upstream by any of the distros, including Fedora. It also requires a few newer packages that you're not going to find in Fedora 16. I ended up trying it out on Fedora 17, and installing a slew of OCaml packages.

To get whenjobs, you can either grab the most recent tarball or go for the most recent code out of the git repository. You can get the latest by using git clone git://git.annexia.org/git/whenjobs.git but I'd recommend going with the tarball.

Jones recommends just building whenjobs with rpmbuild -ta whenjobs-*.tar.gz. (Replace the * with the version you have, of course.) If you have all the dependencies needed, you should wind up with an RPM that you can install after it's done compiling.

Using whenjobs

To use whenjobs, you'll need to start the daemon. Note that you don't start this as root, you want to run it as your normal user.

According to the documentation, you want to start the daemon with whenjobs --daemon, but Jones tells me this isn't implemented just yet. Instead, you'll want to run /usr/sbin/whenjobsd to start the daemon. You can verify that it's running by using pgrep whenjobsd. (Eventually you'll be able to use whenjobs --daemon-status.)

To start adding jobs to your queue, use whenjobs -e. This should drop you into your jobs script and let you start adding jobs. The format is markedly different than cron's, so let's look at what we've got from the sample whenjobs scripts.


every 10 minutes :<< # Get free blocks in /home free=`stat -f -c %b /home` # Set the variable 'free_space' whenjobs --type int --set free_space $free>>when changes free_space && free_space < 100000 :<< mail -s "ALERT: only $free_space blocks left on /home" $LOGNAME >


Jobs start with a periodic statement or a when statement. If you want a job to run at selected intervals no matter what, use the every period statement. The period can be something like every day or every 2 weeks or even every 2 millenia. I think Jones is being a wee bit optimistic with that one, but on the plus side – if whenjobs is still in use 1,000 years from now and it doesn't run your job, Jones probably won't have to deal with the bug report...

Otherwise, you can use the when statement to evaluate an expression, and then perform a job if the statement is true. See the man page online for all of the possible when statements that are supported.

As you can see, you can also set variables for whenjobs. It accepts several types of variables, such as ints, strings, booleans, and so forth. You can see and set variables using whenjobs --variables or whenjobs --set variable.

The script for the job is placed between brackets (<< >>). Here you can use normal shell scripts. The scripts are evaluated with the $SHELL variable or /bin/sh if that's not set. Presumably you could use tcsh or zsh instead if you prefer those.

If you want to see the jobs script without having to pop it open for editing, use whenjobs -l. You can use whenjobs --jobs to see jobs that are actually running. If you need to cancel one, use whenjobs --cancel serial where the serial number is the one given by the whenjobs --jobs command.

A cron Replacement?

I don't think whenjobs is quite ready to be rolled out as a cron replacement just yet, but it's definitely worth taking a look at if you've ever felt frustrated with cron's limitations. It will probably be a while before whenjobs starts making its way into the major distros, but if you're feeling a little adventurous, why not start working with it this weekend?

]]>
This post was made using the Auto Blogging Software from WebMagnates.org This line will not appear when posts are made after activating the software to full version.

Saturday, March 3, 2012

Weekend Project: Take a Tour of Open Source Eye-Tracking Software

Right this very second, you are looking at a Web browser. At least, those are the odds. But while that's mildly interesting to me, detailed data on where users look (and for how long) is mission-critical. Web designers want to know if visitors are distracted from the contents of the page. Application developers want to know if users have trouble finding the important tools and functions on screen. Plus, for the accessibility community, being able to track eye motion lets you provide text input and cursor control to people who can't operate standard IO devices. Let's take a look at what open source software is out there to track eyes and turn it into useful data.

Right this very second, you are looking at a Web browser. At least, those are the odds. But while that's mildly interesting to me, detailed data on where users look (and for how long) is mission-critical. Web designers want to know if visitors are distracted from the contents of the page. Application developers want to know if users have trouble finding the important tools and functions on screen. Plus, for the accessibility community, being able to track eye motion lets you provide text input and cursor control to people who can't operate standard IO devices. Let's take a look at what open source software is out there to track eyes and turn it into useful data.

The categories mentioned above do a fairly clean job of dividing up the eye-tracking projects. Some are designed primarily for use in user-behavior studies, like you might find in a laboratory setting. Some are intended to serve as part of an input framework for people with disabilities. But even within those basic categories, you'll find plenty of variety and flexibility.

For example, there are eye-tracking projects designed to work with standard, run-of-the-mill Web cams (like those that come conveniently attached to the top edge of so many laptops), and those meant to be used with a specialty, head-mounted apparatus.

Many projects have a particular use-case in mind, but with the ready availability of Webcams, developers are exploring alternative uses suitable for gaming, gesture-input, and all sorts of crazy ideas. In addition, regardless of how you capture the eye-tracking data, it requires special software to interpret it in a useful fashion.

Tracking Eye Movement With a Webcam

On the inexpensive end of the hardware spectrum are those projects that implement eye-tracking using a standard-issue Webcam.

OpenGazer is by far the simplest such project to get started with. The code is developed as an academic research effort, which has the unfortunate side effect of making public releases sporadic. The tarball linked to from the project's home page is a couple of years old, however there is much newer code available on GitHub, along with compilation and installation instructions.

OpenGazerOpenGazer is licensed under GPLv2, and includes a Python application called HeadTracker that tracks head motion in order to narrow down the field of vision that OpenGazer watches for eye movement. Any USB Webcam supported by Linux will work.

Two more offerings are designed to work with USB Webcams, but they're both written for Windows. The licenses do permit them to be adapted to Linux and other OSes, however. Gaze Tracker is a GPLv3 tool with a GUI and a built-in calibration aide. It supports both video and infrared Webcams.

TrackEye is licensed under the Code Project Open License, which seems to be unique to the author's hosting site. Notably, the only restrictions it imposes are not on the reuse or redistribution of the software, but on altering the accompanying documents. Given the choice, a standard, accepted license is always preferable, but TrackEye may be worth studying.

Tracking Eye Movement with Specialty Equipment

There are two open source eye-tracking tools that require specialty headgear -- akin to a glasses frame with a miniature Webcam attached, aimed at the eyes. It may not look cool, but the restriction saves CPU cycles by ensuring that the wearer's eyes are always in-frame, and no code is required to first locate the eye before tracking the movement.

openEyes is a project that produces three separate tools. cvEyeTracker is a standalone, real-time eye-tracking application, built on top of the OpenCV computer vision library. However, it's designed to function with two video cameras attached, and appears to expect both of them to be Firewire. Visible Spectrum Starbust is a tool for picking up eye movement in a video file recorded separately, which may be a simpler solution for those without access to the Firewire hardware needed by cvEyeTracker.

The third package, Starburst, is a stand-alone pupil-recognition tool; the algorithm is the same one used by both of the other applications — it is just packaged separately for easier re-use. All of the openEyes code is licensed under GPLv2. The project also includes plans for building the video capture hardware used by the applications.

The EyeWriter project is an effort to build a usable eye-movement input system for a user with paralysis. However, the code it has produced is general-purpose enough to be used for other projects as well. It is designed to work with the Playstation Eye, an off-the-shelf component akin to the more widely known Microsoft Kinect.

Eye-Driven Input and Pointer Control

Using eye-tracking software as an accessibility tool (as the EyeWriter project does) includes not only identifying the iris and pupil in a video image, but translating the motion that it detects into the desktop environment's input system.

GNOME's MouseTrap is a component designed to do this. Thanks to its integration with the GNOME desktop environment, it is relatively easy to get started with (in fact, many distributions already package it). However, MouseTrap does rely on an older version of OpenCV. There is a patch to update the code for the latest changes, but GNOME 3 is still in the process of updating the usability tools found in GNOME 2.x, so you could experience other incompatibilities.

eViacam is a newer project – still actively developed – that uses head-tracking to move the mouse pointer. In October 2011, the GNOME project discussed the possibility of using eViacam as a modern replacement for MouseTrap, but decided that for the time being, it was not a good fit due to its non-GNOME dependencies.

SITPLUS is a multi-input system that supports eye tracking as well as motion capture through Nintendo Wii remotes and several other mechanisms. It is a GPLed framework for designing interactive applications – the project's main goal appears to be promoting activity for people with cerebral palsy and other motor impairments, but it has other potential uses as well.

OpenGazer (mentioned in the Webcam section above) includes a facial-gesture recognition engine that can also be used as an input system for the Dasher gesture-driven text input system; although here again you may have to do some work to integrate it with your system.

Finally, there are two hardware-centric projects worth mentioning. The Eyeboard is an inexpensive hardware device that uses electro-oculography (detecting eye movement with electrodes, rather than through video pattern-recognition) and a special text input frame to allow users to type by focusing on the monitor.

The Eye Gaze is a person-to-person communication device that uses a "window frame" to track the letters and numbers selected by the user. As the wiki article explains, however, commercial devices like the Eye Gaze are often expensive — but they do not have to be, and their simplicity makes them easily usable with ordinary Webcams.

Processing Eye-Movement Data

In contrast, the "usability study" use case for eye-tracking data requires software to map the eye movements — so that they can be overlaid on a site or application design to follow eye motion, or to generate a heat-map of what regions capture the most attention. Currently there appears to be no eye movement analysis or visualization software developed for Linux, however there are some successful tools for other platforms that could form the basis for viable ports.

CARPE (for Computational and Algorithmic Representation and Processing of Eye-movements) is a GPLv3 library for visualizing eye motion data. It can creator contour maps, heat maps, cluster plots, and several other visualizations, and can overlay the data onto video for easier analysis. It is Windows-only at the moment, although it uses OpenCV under the hood.

OGAMA (for Open Gaze And Mouse Analyzer) is another Windows-based toolkit. It is also GPLv3, and it is written in C#. It includes a live eye-motion recording component in addition to its analysis and visualization components. The software can process raw eye tracking data to locate points of interest, calculate statistics for external analysis, and create several visualization.

RITcode is an eye-motion analysis framework developed by the Rochester Institute of Technology's Visual Perception Lab. It is developed for Mac OS X, although the code base has not been updated in some time.

Several utilities with good reputations have, for whatever reason, been made available under awkward or incompatible licensing terms. For example, Oleg Komogortsev's eye-movement classification tools at Texas State University. Dr. Komogortsev says he wants them to be available to the community, but they are only usable by requesting a password directly from the researchers.

A similar situation exists for the Eye-Tracking Universal Driver and the MyEye project, both of which are only available under non-specific "freeware" terms. For all practical purposes, these licensing situations restrict the software's usage considerably, and will continue to do so unless the authors have a change of heart and adopt standard licenses.

Looking Ahead

For Linux users, then, the eye-tracking marketplace is a bit of a mixed bag. There is plenty of "raw material" — including eye-movement capture software, frameworks for using eye motion as input, and algorithms for analyzing and visualizing motion data. The trouble is that most of it is either developed only for Windows, or it is maintained as a stand-alone project that makes integrating with other software difficult.

This does not mean that the situation is dire, however. The GNOME accessibility team, for example, is still pursuing eye-tracking at its hackfests as well as exploring several of the independent project mentioned above. Not too long ago, that included meeting up with the aforementioned OpenGazer project, among others.

What is less clear is where Linux fans can collaborate with the data analysis and visualization projects. The biggest users of such technology is in the human-computer interaction (HCI) and UI design communities, which constitute a small group within the larger Linux universe. Still, there is clearly enough knowledge out there -- and license-compatible software available — that an interested party could pick up the pieces and assemble a high quality, open source solution. The rise in popularity of the Microsoft Kinect (particularly the OpenKinect free software drivers) could reinvigorate interest in eye-tracking, to everyone's benefit.

]]>
This post was made using the Auto Blogging Software from WebMagnates.org This line will not appear when posts are made after activating the software to full version.

Friday, February 17, 2012

Weekend Project: Get Started with Tahoe-LAFS Storage Grids

Here's an axiom for every major organization to memorize: if you have data, then you have a data storage problem. But while the cloud service players are happy to compete for your business, you may not need to purchase a solution. A number of open source projects offer flexible ways to build your own distributed, fault-tolerant storage network. This weekend, let's take a look at one of the most intriguing offerings: Tahoe LAFS.

Here's an axiom for every major organization to memorize: if you have data, then you have a data storage problem. But while the cloud service players are happy to compete for your business, you may not need to purchase a solution. A number of open source projects offer flexible ways to build your own distributed, fault-tolerant storage network. This weekend, let's take a look at one of the most intriguing offerings: Tahoe LAFS.

Tahoe is a "Least Authority File System" — the LAFS you often see in concert with its name. The LAFS design is an homage to the security world's "principle of least privilege": simply put, Tahoe uses cryptography and access control to protect access to your data. Specifically, the host OS on a Tahoe node never has read or write access to any of the data it stores: only authenticated clients can collect and assemble the correct chunks from across the distributed nodes, and decrypt the files.

Beyond that, though, Tahoe offers peer-to-peer distributed data storage with adjustable levels of redundancy. You can tune your "grid" for performance, fault-tolerance, or strike a balance in between, and you can use heterogeneous hardware and service providers to make up your nodes, providing you with a second layer of protection. Furthermore, although you can use Tahoe-LAFS as a simple distributed filesystem, you can also run web and (S)FTP services directly from your Tahoe grid.

Installation and Testing

The most recent Tahoe release is version 1.9.1, from January 2012. The project provides tarballs for download only, but many Linux distributions now offer the package as well, so check with your package management system first. Tahoe is written in Python, and uses the Twisted framework, as well as an assortment of auxiliary Python libraries (for cryptography and other functions). None are particularly unusual, but if you are installing from source, be sure to double check your dependencies.

Once you have unpacked the source package, execute python ./setup.py build to generate the Tahoe command line tools, then run python ./setup.py test to run the installer's sanity check suite. I found that the Ubuntu package failed to install python-mock, but Tahoe's error messages caught that mistake and allowed me to install the correct library without any additional trouble.

Now that you have the Tahoe tools built, you can connect to the public test grid to get a feel for how the storage system works. This grid is maintained by the project, and is variously referred to as pubgrid or Test Grid. You can experiment with the Tahoe client apps on pubgrid — however, because it is a testbed only, its uptime is not guaranteed, and the maintainers may periodically wipe and rebuild it.

First, run tahoe create-client. This creates a local client-only node on your machine (meaning that it does not offer storage space to the grid), which you will connect to pubgrid by editing the configuration file in ~/.tahoe/tahoe.cfg. Open the tahoe.cfg file and edit the nickname = and introducer.furl = lines.

The nickname is any moniker you choose for your node. During this testing phase, the name makes no difference, but when deploying a grid, useful names can help you keep better tabs on your nodes' performance and uptime. The "introducer" is Tahoe lingo for the manager node that oversees a grid — keeping track of the participating nodes in a publish/subscribe "hub" fashion. The pubgrid's current "FURL" address is pb://tin57bdenwkigkujmh6rwgztcoh7ya7t@pubgrid.tahoe-lafs.org:50528/introducer — but check the Tahoe wiki before entering it in the configuration file, in case it has changed.

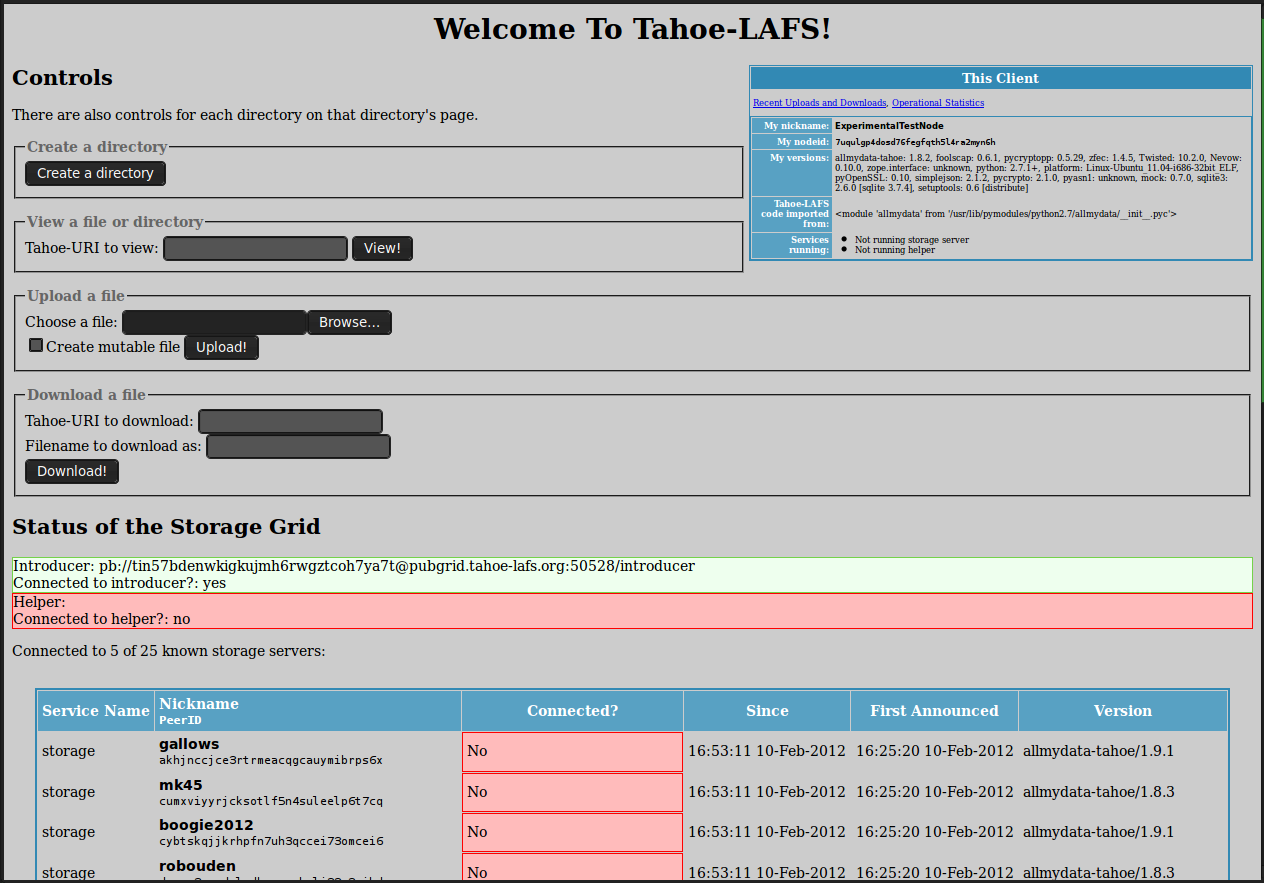
Save your configuration file, then run ./tahoe start at the command line. You're now connected! By default, Tahoe offers a web-based interface running at http://127.0.0.1:3456 ... open that address in your web browser, and you will see both a status page for pubgrid (including the grid IDs of nearby peers), and the controls you need to create your own directories and upload test files.

File Storage and Other Front-Ends

Part of Tahoe's LAFS security model is that the directories owned by other nodes are not searchable or discoverable. When you create a directory (on pubgrid or on any other grid), a unique pseudorandom identifier is generated that you must bookmark or scrawl down someplace where you won't forget it. The project has created a shared public directory on pubgrid at this long, unwieldy URI, which gives you an idea of the hash function used.

You can add directories or files in the shared public directory, or create new directories and upload files of your own. But whenever you do, it is up to you to keep track of the URIs Tahoe generates. You can share Tahoe files with other users by sending them the URIs directly. Note also that whenever you upload a file, you have the option to check a box labeled "mutable." This is another security feature: files created as immutable are write-protected, and can never be altered.

In the default setup, your client-only node is not contributing any local disk space to the grid's shared pool. That setting is controlled in the [storage] stanza of the tahoe.cfg file. Bear in mind that the objects stored on your contribution to the shared pool are encrypted chunks of files from around the grid; you will not be able to inspect their contents. For a public grid, that is something worth thinking about, although when running a grid for your own business or project, it is less of a concern.

If all you need to do store static content and be assured that it is securely replicated off-site, then the default configuration as used by pubgrid may be all that you need. Obviously, you will want to run your own storage nodes, connected through your own introducer — but the vanilla file and directory structure as exposed through the web GUI will suffice. There are other options, however.

Tahoe includes REST API in tandem to the human-accessible web front-end. This allows you to use a Tahoe LAFS grid as the storage engine to a web server. The API exposes standard GET, PUT, POST, and DELETE methods, and supports JSON and HTML output. The API is customized to make Tahoe's long, human-unreadable URIs easier to work with, and provides utilities to more easily work with operations (such as search) than can take longer on a distributed grid than they would on a static HTTP server.

There is also an FTP-like front-end, which support SSL-encrypted SFTP operations, and a command-line client useful for server environments or remote grid administration. Finally, a "drop upload" option is available in the latest builds, which allows Tahoe to monitor an upload directory, and automatically copy any new files into the grid.

Running Your Own Grid

The pubgrid is certainly a useful resource for exploring how Tahoe and its various front-ends function, but for any real benefit you need to deploy your own grid. Designing a grid is a matter of planning for the number of storage nodes you will need, determining how to tune the encoding parameters for speed and redundancy, and configuring the special nodes that manage logging, metadata, and other helper utilities.

The storage encoding parameters include shares.needed, shares.total, and shares.happy (all of which are configurable in the tahoe.cfg file). A file uploaded to the grid is divided into shares.needed chunks, to be distributed across the nodes. Tahoe will replicate a total of shares.total chunks, so total must be greater-than-or-equal-to needed. If they are equal, there is no redundancy.

The third parameter, shares.happy, defines the minimum number of nodes the chunks of any individual file must be spread across. Setting this value too low sacrifices the benefits of redundancy. By default, Tahoe is designed to be tolerant of nodes whose availability comes and goes, not only to cope with failure, but to allow for a truly distributed design where some nodes can be disconnected and not damage the grid as a whole. There is a lot to consider when designing your grid parameters; a good introduction to the trade-offs is hosted on the project's wiki.

You can run services — such as the (S)FTP and HTTP front-ends discussed above — on any storage node. But you will also need at least one special node, the introducer node required for clients to make an initial connection to the grid. Introducers maintain a state table keeping track of the nodes in a grid; they look for basic configuration in the [node] section of tahoe.cfg, but ignore all other directives.

To start yours, create a separate directory for it (say, .tahoe-my-introducer/, change into the directory, and run tahoe create-introducer . followed by tahoe start .. When launched, the new introducer creates a file named introducer.furl; this holds the "FURL" address that you must paste into the configuration file on all of your other nodes.

You can also (optionally) create helper, key-generator, and stats-gatherer nodes for your grid, to offload some common tasks onto separate machines. A helper node simply assists the chunk replication process, which can be slow if many duplicate chunks are required. You can designate a node as a helper by setting enabled = true under the [helper] stanza in tahoe.cfg.

The setup process key-generators and stats-gatherers is akin to that for introducers: run tahoe create-key-generator . or tahoe create-stats-gatherer . in a separate directory, followed by tahoe start .. Stats gatherers are responsible for logging and maintaining data on the grid, while key generators simply speed up the computationally-expensive process of creating cryptographic tokens. Neither is required, but using them can improve performance.

Setting up a Tahoe LAFS grid to serve your company or project is not a step to be taken lightly — you need to consider the maintenance requirements as well as how the competing speed and security features add up for your use case. But the process is simple enough that you can undertake it in just a few days, and even run multi-node experiments, all with a minimum of fuss.

]]>

Weekend Project: Get Started with Tahoe-LAFS Storage Grids

Here's an axiom for every major organization to memorize: if you have data, then you have a data storage problem. But while the cloud service players are happy to compete for your business, you may not need to purchase a solution. A number of open source projects offer flexible ways to build your own distributed, fault-tolerant storage network. This weekend, let's take a look at one of the most intriguing offerings: Tahoe LAFS.

Tahoe is a "Least Authority File System" — the LAFS you often see in concert with its name. The LAFS design is an homage to the security world's "principle of least privilege": simply put, Tahoe uses cryptography and access control to protect access to your data. Specifically, the host OS on a Tahoe node never has read or write access to any of the data it stores: only authenticated clients can collect and assemble the correct chunks from across the distributed nodes, and decrypt the files.

Beyond that, though, Tahoe offers peer-to-peer distributed data storage with adjustable levels of redundancy. You can tune your "grid" for performance, fault-tolerance, or strike a balance in between, and you can use heterogeneous hardware and service providers to make up your nodes, providing you with a second layer of protection. Furthermore, although you can use Tahoe-LAFS as a simple distributed filesystem, you can also run web and (S)FTP services directly from your Tahoe grid.

Installation and Testing

The most recent Tahoe release is version 1.9.1, from January 2012. The project provides tarballs for download only, but many Linux distributions now offer the package as well, so check with your package management system first. Tahoe is written in Python, and uses the Twisted framework, as well as an assortment of auxiliary Python libraries (for cryptography and other functions). None are particularly unusual, but if you are installing from source, be sure to double check your dependencies.

Once you have unpacked the source package, execute python ./setup.py build to generate the Tahoe command line tools, then run python ./setup.py test to run the installer's sanity check suite. I found that the Ubuntu package failed to install python-mock, but Tahoe's error messages caught that mistake and allowed me to install the correct library without any additional trouble.

Now that you have the Tahoe tools built, you can connect to the public test grid to get a feel for how the storage system works. This grid is maintained by the project, and is variously referred to as pubgrid or Test Grid. You can experiment with the Tahoe client apps on pubgrid — however, because it is a testbed only, its uptime is not guaranteed, and the maintainers may periodically wipe and rebuild it.

First, run tahoe create-client. This creates a local client-only node on your machine (meaning that it does not offer storage space to the grid), which you will connect to pubgrid by editing the configuration file in ~/.tahoe/tahoe.cfg. Open the tahoe.cfg file and edit the nickname = and introducer.furl = lines.

The nickname is any moniker you choose for your node. During this testing phase, the name makes no difference, but when deploying a grid, useful names can help you keep better tabs on your nodes' performance and uptime. The "introducer" is Tahoe lingo for the manager node that oversees a grid — keeping track of the participating nodes in a publish/subscribe "hub" fashion. The pubgrid's current "FURL" address is pb:// This e-mail address is being protected from spambots. You need JavaScript enabled to view it :50528/introducer — but check the Tahoe wiki before entering it in the configuration file, in case it has changed.

Save your configuration file, then run ./tahoe start at the command line. You're now connected! By default, Tahoe offers a web-based interface running at http://127.0.0.1:3456 ... open that address in your web browser, and you will see both a status page for pubgrid (including the grid IDs of nearby peers), and the controls you need to create your own directories and upload test files.

File Storage and Other Front-Ends

Part of Tahoe's LAFS security model is that the directories owned by other nodes are not searchable or discoverable. When you create a directory (on pubgrid or on any other grid), a unique pseudorandom identifier is generated that you must bookmark or scrawl down someplace where you won't forget it. The project has created a shared public directory on pubgrid at this long, unwieldy URI, which gives you an idea of the hash function used.

You can add directories or files in the shared public directory, or create new directories and upload files of your own. But whenever you do, it is up to you to keep track of the URIs Tahoe generates. You can share Tahoe files with other users by sending them the URIs directly. Note also that whenever you upload a file, you have the option to check a box labeled "mutable." This is another security feature: files created as immutable are write-protected, and can never be altered.

Tahoe WebGUIIn the default setup, your client-only node is not contributing any local disk space to the grid's shared pool. That setting is controlled in the [storage] stanza of the tahoe.cfg file. Bear in mind that the objects stored on your contribution to the shared pool are encrypted chunks of files from around the grid; you will not be able to inspect their contents. For a public grid, that is something worth thinking about, although when running a grid for your own business or project, it is less of a concern.

If all you need to do store static content and be assured that it is securely replicated off-site, then the default configuration as used by pubgrid may be all that you need. Obviously, you will want to run your own storage nodes, connected through your own introducer — but the vanilla file and directory structure as exposed through the web GUI will suffice. There are other options, however.

Tahoe includes REST API in tandem to the human-accessible web front-end. This allows you to use a Tahoe LAFS grid as the storage engine to a web server. The API exposes standard GET, PUT, POST, and DELETE methods, and supports JSON and HTML output. The API is customized to make Tahoe's long, human-unreadable URIs easier to work with, and provides utilities to more easily work with operations (such as search) than can take longer on a distributed grid than they would on a static HTTP server.

There is also an FTP-like front-end, which support SSL-encrypted SFTP operations, and a command-line client useful for server environments or remote grid administration. Finally, a "drop upload" option is available in the latest builds, which allows Tahoe to monitor an upload directory, and automatically copy any new files into the grid.

Running Your Own Grid

The pubgrid is certainly a useful resource for exploring how Tahoe and its various front-ends function, but for any real benefit you need to deploy your own grid. Designing a grid is a matter of planning for the number of storage nodes you will need, determining how to tune the encoding parameters for speed and redundancy, and configuring the special nodes that manage logging, metadata, and other helper utilities.

The storage encoding parameters include shares.needed, shares.total, and shares.happy (all of which are configurable in the tahoe.cfg file). A file uploaded to the grid is divided into shares.needed chunks, to be distributed across the nodes. Tahoe will replicate a total of shares.total chunks, so total must be greater-than-or-equal-to needed. If they are equal, there is no redundancy.

The third parameter, shares.happy, defines the minimum number of nodes the chunks of any individual file must be spread across. Setting this value too low sacrifices the benefits of redundancy. By default, Tahoe is designed to be tolerant of nodes whose availability comes and goes, not only to cope with failure, but to allow for a truly distributed design where some nodes can be disconnected and not damage the grid as a whole. There is a lot to consider when designing your grid parameters; a good introduction to the trade-offs is hosted on the project's wiki.

You can run services — such as the (S)FTP and HTTP front-ends discussed above — on any storage node. But you will also need at least one special node, the introducer node required for clients to make an initial connection to the grid. Introducers maintain a state table keeping track of the nodes in a grid; they look for basic configuration in the [node] section of tahoe.cfg, but ignore all other directives.

To start yours, create a separate directory for it (say, .tahoe-my-introducer/, change into the directory, and run tahoe create-introducer . followed by tahoe start .. When launched, the new introducer creates a file named introducer.furl; this holds the "FURL" address that you must paste into the configuration file on all of your other nodes.

You can also (optionally) create helper, key-generator, and stats-gatherer nodes for your grid, to offload some common tasks onto separate machines. A helper node simply assists the chunk replication process, which can be slow if many duplicate chunks are required. You can designate a node as a helper by setting enabled = true under the [helper] stanza in tahoe.cfg.

The setup process key-generators and stats-gatherers is akin to that for introducers: run tahoe create-key-generator . or tahoe create-stats-gatherer . in a separate directory, followed by tahoe start .. Stats gatherers are responsible for logging and maintaining data on the grid, while key generators simply speed up the computationally-expensive process of creating cryptographic tokens. Neither is required, but using them can improve performance.

Setting up a Tahoe LAFS grid to serve your company or project is not a step to be taken lightly — you need to consider the maintenance requirements as well as how the competing speed and security features add up for your use case. But the process is simple enough that you can undertake it in just a few days, and even run multi-node experiments, all with a minimum of fuss.


busy

Friday, February 3, 2012

Weekend project: Zap Your Coworkers' Minds with Multi-Pointer X

Care to rethink your desktop user experience? It may be simpler than you think. Chances are you own more than one pointing device, but for years you've never been able to take full advantage of that hardware, because whenever you plugged in a second hardware mouse, it simply shared control of the same cursor. But with X, it doesn't have to: you can have any many distinct, independent cursors on screen as you have devices to control them. So grab a spare from the parts box in the closet, and get ready for the ol' one-two punch.

Care to rethink your desktop user experience? It may be simpler than you think. Chances are you own more than one pointing device, but for years you've never been able to take full advantage of that hardware, because whenever you plugged in a second hardware mouse, it simply shared control of the same cursor. But with X, it doesn't have to: you can have any many distinct, independent cursors on screen as you have devices to control them. So grab a spare from the parts box in the closet, and get ready for the ol' one-two punch.

What, you don't have a spare mouse? There a good chance you do have a second pointing device, though — even if it's a mouse and the built-in trackpad on your laptop. But this process will work for any pointing hardware recognized by X, including a trackball and a mouse, or even a mouse and a pen tablet. To X, they are all the same. You will need to ensure that you are running the X.org X server 1.7 or later to use the feature in questions, Multi-Pointer X (MPX). You almost certainly already are — X.org 1.7 was finalized in 2009, and all mainstream distributions follow X.org closely. Bring up your distribution's package manager and install the libxi and libxcursor development packages as well; they will come in handy later.

What is MPX?

So why don't we use MPX all the time? For starters, most of the time one cursor on screen is all that we need, because there are very few applications that benefit from multiple pointers. But there are several. The simplest use case is for multi-head setups, where two or more separate login sessions run on the same machine, using different video outputs and separate keyboard/mouse combinations. You often see this type of configuration in classrooms and computer labs.

But the more unusual and intriguing alternative is running multiple pointers in a single session, which can simplify tasks that involve lots of manipulating on-screen objects. If you paint with a pressure-sensitive tablet using Krita or MyPaint, for example, a second cursor might allow you to keep your tablet pen on the canvas and alter paint settings or brush dynamics without hopping back-and-forth constantly. The same goes for other creative jobs like animation and 3D modeling: the more control, the easier it gets. Plus, let's be frank, there's always the wow factor — experimenting and showing off what Linux can do that lesser OSes cannot.

The basics

MPX is implemented in the XInput2 extension, which handles keyboards and pointing devices. The package is a core requirement for all desktop systems, but most users don't know that it comes with a handy command-line tool to inspect and alter the X session's input settings. The tool is named xinput, and if you run xinput list, it will print out a nested list of all of your system's active input devices. Mine looks like this:


⎡ Virtual core pointer id=2[master pointer (3)]⎜ ↳ Virtual core XTEST pointer id=4[slave pointer (2)]⎜ ↳ Microsoft Microsoft Trackball Explorer®id=9[slave pointer (2)]⎣ Virtual core keyboard id=3[master keyboard (2)] ↳ Virtual core XTEST keyboard id=5[slave keyboard (3)] ↳ Power Button id=6[slave keyboard (3)] ↳ Power Button id=7[slave keyboard (3)] ↳ Mitsumi Electric Goldtouch USB Keyboard id=8[slave keyboard (3)]


As you can see, I have one "virtual" core pointer and a corresponding "virtual" core keyboard, both of which are "master" devices to which the real hardware (the trackball and USB keyboard) are attached as slaves. Normally, whenever you attach a new input device, X attaches it as another slave to the existing (and only) master, so that all of your mice control the same pointer. In order to use them separately, we need to create a second virtual pointer device, then attach our new hardware and assign it as a slave to the second virtual pointer.

From a console, run xinput create-master Secondary to create another virtual device. The command as written will name it "Secondary" but you can choose any name you wish. Now plug in your second pointing device (unless it is already plugged in, of course), and run xinput list again. I plugged in my Wacom tablet, which added three lines to the list:


⎜ ↳ Wacom Graphire3 6x8 eraser id=16[slave pointer (2)]⎜ ↳ Wacom Graphire3 6x8 cursor id=17[slave pointer (2)]⎜ ↳ Wacom Graphire3 6x8 stylus id=18[slave pointer (2)]


The new virtual device also shows up, as a matched pointer/keyboard pair:

⎡ Secondary pointer id=10[master pointer (11)]⎜ ↳ Secondary XTEST pointer id=12[slave pointer (10)]⎣ Secondary keyboard id=11[master keyboard (10)] ↳ Secondary XTEST keyboard id=15[slave keyboard (11)]


That's because so far, X does not know whether we're interested in the keyboard or the pointer. You'll also note that every entry has a unique id, including the new hardware and the new virtual devices. The "cursor" entry for the Wacom tablet is the only one of the three we care about, and its id is 17. Running xinput reattach 17 "Secondary pointer" assigns it as a slave to the Secondary virtual pointer device, and voila — a second cursor appears on screen immediately.

You can start to use both pointers immediately (provided that your hand-eye coordination is up to the task). Grab two icons on the desktop at once, rearrange your windows with both hands, click on menus in two running applications at once.

Cursors, Foiled Again

What you'll soon find out, though, is that life on the bleeding edge comes with some complications. First of all, your mouse cursors look exactly the same, which can be confusing. Secondly, although GTK+3 itself is fully aware of XInput2 and can cope with MPX, individual applications may not be. That means you can uncover a lot of bugs simply by using both pointers at once.

You can tackle the indistinguishable-cursors issue by assigning a different X cursor theme to the second pointer. The normal desktop environments don't support this in their GUI preferences tools, but developer Antonio Ospite wrote a quick utility called xicursorset that fills in the gap. Compiling it requires the libxi and libxcursor development packages mentioned earlier, but it does not require any heavy dependencies, nor do you even need to install it as root — it runs quite happily in your home directory.

To assign a theme to your new cursor, simply run ./xicursorset 10 left_ptr some-cursor-theme-name. In this call, 10 is the id of our "Secondary pointer" entry from above, and left_ptr is the default cursor shape (X changes the cursor to a text-insertion point, resize-tool, and "wait" symbol, among other options, as needed). X.org cursor theme packages are provided by every Linux distribution; the "DMZ" theme is GNOME's default and uses a white arrow.

The simplest option might be to use the DMZ-Black variant: ./xicursorset 10 left_ptr DMZ-Black, but there are far more, including multi-color options. I personally grabbed the DMZ-Red theme from gnome-look.org's X cursor section, to make the auxiliary cursor stand out more.

One thing you will notice about these instructions is that they do not persist between reboots or login sessions. Currently there is no way to configure X.org to remember your wild and crazy cursor setups. I asked MPX author Peter Hutterer what the reasoning was, and he said it simply hadn't been asked for yet. Because MPX usage is limited to a few applications and usage scenarios, most people only use it in a dynamic sense — plugging in a second device when they need it for a particular task.

On the other hand, one of Ospite's readers (an MPX user named Vicente) wrote a small Bash script to automate the process; if you use MPX a lot, it could save you some keystrokes.

Multi-Tasking

But, as Hutterer said, apps with explicit support for MPX are pretty limited at this stage. There is a multi-cursor painting application included with Vinput, and the popular multiplayer game World Of Goo can use MPX to enable simultaneous play. There was a dedicated standalone painting application called mpx-paint hosted at GitHub, but the developer's account appears to have shut down.

Mainstream applications have been slower to pick up on MPX support. Inkscape is a likely candidate, where manipulating two or more control points at once would open up new possibilities. Developer Jon Cruz says it is "on the short list" alongside Inkscape's growing support for extended input devices. Whenever the application completes its port to GTK+3, the MPX support will follow.

Blender has also discussed MPX, but so far the project's main focus has been on six-axis 3D controllers (which are understandably a higher priority). However, for broader adoption we may have to wait. Hutterer himself worked on bringing MPX support to the Compiz window manager, but said that the real sticking point is tackling the "unsolved questions" about window management — which is something the desktop environment will need to tackle. Luckily, the latest X.org release includes multi-touch support — a related technology useful for gestures. As Linux on tablets continues to grow, gestures become an increasingly in-demand option. As applications are adapted to support multi-touch gestures, MPX support should grow as well.

The implications are interesting for a number of tasks, including the gaming and creative applications already discussed. When you throw in the possibility of multiple keyboards, the possibilities get even broader. After all, thanks to network-aware text editors like Gobby and Etherpad, we are getting more comfortable with multiple edit points in our document editors. Imagine what you could do with an IDE that allowed you to edit the code in one window while you interacted with the runtime simultaneously. In can be hard to grasp the implications — but you don't have to dream them all up; with MPX you can experiment today.

]]>


Comming Up:


Asbestos death rates are on the rise, learn what you need to lookout for when it comes to asbestos and mesothelioma.

Weekend project: Zap Your Coworkers' Minds with Multi-Pointer X

Care to rethink your desktop user experience? It may be simpler than you think. Chances are you own more than one pointing device, but for years you've never been able to take full advantage of that hardware, because whenever you plugged in a second hardware mouse, it simply shared control of the same cursor. But with X, it doesn't have to: you can have any many distinct, independent cursors on screen as you have devices to control them. So grab a spare from the parts box in the closet, and get ready for the ol' one-two punch.

What, you don't have a spare mouse? There a good chance you do have a second pointing device, though — even if it's a mouse and the built-in trackpad on your laptop. But this process will work for any pointing hardware recognized by X, including a trackball and a mouse, or even a mouse and a pen tablet. To X, they are all the same. You will need to ensure that you are running the X.org X server 1.7 or later to use the feature in questions, Multi-Pointer X (MPX). You almost certainly already are — X.org 1.7 was finalized in 2009, and all mainstream distributions follow X.org closely. Bring up your distribution's package manager and install the libxi and libxcursor development packages as well; they will come in handy later.

What is MPX?

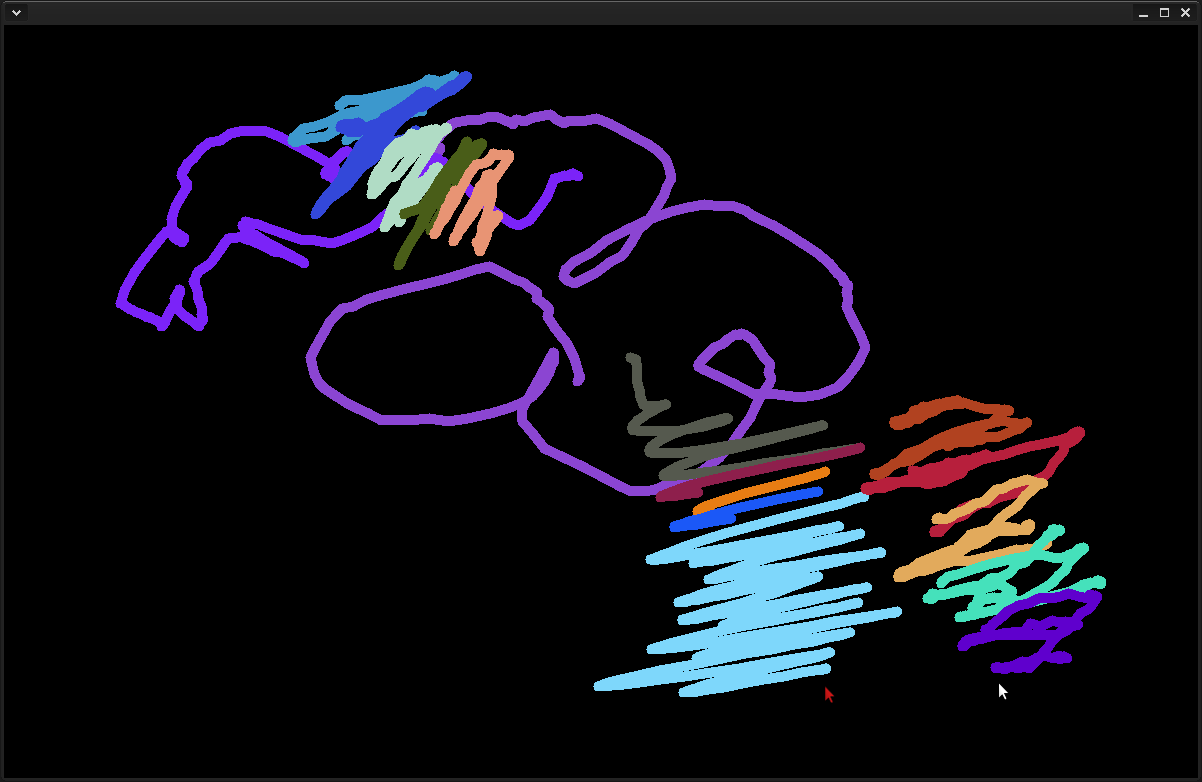
Demo of Vinput demo appSo why don't we use MPX all the time? For starters, most of the time one cursor on screen is all that we need, because there are very few applications that benefit from multiple pointers. But there are several. The simplest use case is for multi-head setups, where two or more separate login sessions run on the same machine, using different video outputs and separate keyboard/mouse combinations. You often see this type of configuration in classrooms and computer labs.

But the more unusual and intriguing alternative is running multiple pointers in a single session, which can simplify tasks that involve lots of manipulating on-screen objects. If you paint with a pressure-sensitive tablet using Krita or MyPaint, for example, a second cursor might allow you to keep your tablet pen on the canvas and alter paint settings or brush dynamics without hopping back-and-forth constantly. The same goes for other creative jobs like animation and 3D modeling: the more control, the easier it gets. Plus, let's be frank, there's always the wow factor — experimenting and showing off what Linux can do that lesser OSes cannot.

The basics

MPX is implemented in the XInput2 extension, which handles keyboards and pointing devices. The package is a core requirement for all desktop systems, but most users don't know that it comes with a handy command-line tool to inspect and alter the X session's input settings. The tool is named xinput, and if you run xinput list, it will print out a nested list of all of your system's active input devices. Mine looks like this:

⎡ Virtual core pointer id=2 [master pointer (3)]⎜ ↳ Virtual core XTEST pointer id=4 [slave pointer (2)]⎜ ↳ Microsoft Microsoft Trackball Explorer® id=9 [slave pointer (2)]⎣ Virtual core keyboard id=3 [master keyboard (2)] ↳ Virtual core XTEST keyboard id=5 [slave keyboard (3)] ↳ Power Button id=6 [slave keyboard (3)] ↳ Power Button id=7 [slave keyboard (3)] ↳ Mitsumi Electric Goldtouch USB Keyboard id=8 [slave keyboard (3)]

As you can see, I have one "virtual" core pointer and a corresponding "virtual" core keyboard, both of which are "master" devices to which the real hardware (the trackball and USB keyboard) are attached as slaves. Normally, whenever you attach a new input device, X attaches it as another slave to the existing (and only) master, so that all of your mice control the same pointer. In order to use them separately, we need to create a second virtual pointer device, then attach our new hardware and assign it as a slave to the second virtual pointer.

From a console, run xinput create-master Secondary to create another virtual device. The command as written will name it "Secondary" but you can choose any name you wish. Now plug in your second pointing device (unless it is already plugged in, of course), and run xinput list again. I plugged in my Wacom tablet, which added three lines to the list:

⎜ ↳ Wacom Graphire3 6x8 eraser id=16 [slave pointer (2)]⎜ ↳ Wacom Graphire3 6x8 cursor id=17 [slave pointer (2)]⎜ ↳ Wacom Graphire3 6x8 stylus id=18 [slave pointer (2)]

The new virtual device also shows up, as a matched pointer/keyboard pair:

⎡ Secondary pointer id=10 [master pointer (11)]⎜ ↳ Secondary XTEST pointer id=12 [slave pointer (10)]⎣ Secondary keyboard id=11 [master keyboard (10)] ↳ Secondary XTEST keyboard id=15 [slave keyboard (11)]

That's because so far, X does not know whether we're interested in the keyboard or the pointer. You'll also note that every entry has a unique id, including the new hardware and the new virtual devices. The "cursor" entry for the Wacom tablet is the only one of the three we care about, and its id is 17. Running xinput reattach 17 "Secondary pointer" assigns it as a slave to the Secondary virtual pointer device, and voila — a second cursor appears on screen immediately.

You can start to use both pointers immediately (provided that your hand-eye coordination is up to the task). Grab two icons on the desktop at once, rearrange your windows with both hands, click on menus in two running applications at once.

Cursors, Foiled Again

What you'll soon find out, though, is that life on the bleeding edge comes with some complications. First of all, your mouse cursors look exactly the same, which can be confusing. Secondly, although GTK+3 itself is fully aware of XInput2 and can cope with MPX, individual applications may not be. That means you can uncover a lot of bugs simply by using both pointers at once.

You can tackle the indistinguishable-cursors issue by assigning a different X cursor theme to the second pointer. The normal desktop environments don't support this in their GUI preferences tools, but developer Antonio Ospite wrote a quick utility called xicursorset that fills in the gap. Compiling it requires the libxi and libxcursor development packages mentioned earlier, but it does not require any heavy dependencies, nor do you even need to install it as root — it runs quite happily in your home directory.

To assign a theme to your new cursor, simply run ./xicursorset 10 left_ptr some-cursor-theme-name. In this call, 10 is the id of our "Secondary pointer" entry from above, and left_ptr is the default cursor shape (X changes the cursor to a text-insertion point, resize-tool, and "wait" symbol, among other options, as needed). X.org cursor theme packages are provided by every Linux distribution; the "DMZ" theme is GNOME's default and uses a white arrow.

The simplest option might be to use the DMZ-Black variant: ./xicursorset 10 left_ptr DMZ-Black, but there are far more, including multi-color options. I personally grabbed the DMZ-Red theme from gnome-look.org's X cursor section, to make the auxiliary cursor stand out more.

One thing you will notice about these instructions is that they do not persist between reboots or login sessions. Currently there is no way to configure X.org to remember your wild and crazy cursor setups. I asked MPX author Peter Hutterer what the reasoning was, and he said it simply hadn't been asked for yet. Because MPX usage is limited to a few applications and usage scenarios, most people only use it in a dynamic sense — plugging in a second device when they need it for a particular task.

On the other hand, one of Ospite's readers (an MPX user named Vicente) wrote a small Bash script to automate the process; if you use MPX a lot, it could save you some keystrokes.

Multi-Tasking

But, as Hutterer said, apps with explicit support for MPX are pretty limited at this stage. There is a multi-cursor painting application included with Vinput, and the popular multiplayer game World Of Goo can use MPX to enable simultaneous play. There was a dedicated standalone painting application called mpx-paint hosted at GitHub, but the developer's account appears to have shut down.

Mainstream applications have been slower to pick up on MPX support. Inkscape is a likely candidate, where manipulating two or more control points at once would open up new possibilities. Developer Jon Cruz says it is "on the short list" alongside Inkscape's growing support for extended input devices. Whenever the application completes its port to GTK+3, the MPX support will follow.

Blender has also discussed MPX, but so far the project's main focus has been on six-axis 3D controllers (which are understandably a higher priority). However, for broader adoption we may have to wait. Hutterer himself worked on bringing MPX support to the Compiz window manager, but said that the real sticking point is tackling the "unsolved questions" about window management — which is something the desktop environment will need to tackle. Luckily, the latest X.org release includes multi-touch support — a related technology useful for gestures. As Linux on tablets continues to grow, gestures become an increasingly in-demand option. As applications are adapted to support multi-touch gestures, MPX support should grow as well.

The implications are interesting for a number of tasks, including the gaming and creative applications already discussed. When you throw in the possibility of multiple keyboards, the possibilities get even broader. After all, thanks to network-aware text editors like Gobby and Etherpad, we are getting more comfortable with multiple edit points in our document editors. Imagine what you could do with an IDE that allowed you to edit the code in one window while you interacted with the runtime simultaneously. In can be hard to grasp the implications — but you don't have to dream them all up; with MPX you can experiment today.


busy

Saturday, January 28, 2012

Weekend Project: Learning Ins and Outs of Arduino

Arduino is an open embedded hardware and software platform designed for rapid creativity. It's both a great introduction to embedded programming and a fast track to building all kinds of cool devices like animatronics, robots, fabulous blinky things, animated clothing, games, your own little fabs... you can build what you imagine. Follow along as we learn both embedded programming and basic electronics.

Arduino is an open embedded hardware and software platform designed for rapid creativity. It's both a great introduction to embedded programming and a fast track to building all kinds of cool devices like animatronics, robots, fabulous blinky things, animated clothing, games, your own little fabs... you can build what you imagine. Follow along as we learn both embedded programming and basic electronics.

What Does Arduino Do?

Arduino was invented by Massimo Banzi, a self-taught electronics guru who has been fascinated by electronics since childhood. Mr. Banzi had what I think of as a dream childhood: endless hours spent dissecting, studying, re-assembling things in creative ways, and testing to destruction. Mr. Banzi designed Arduino to be friendly and flexible to creative people who want to build things, rather than a rigid, overly-technical platform requiring engineering expertise.

The microprocessor revolution has removed a lot of barriers for newcomers, and considerably speeded up the pace of iteration. In the olden days building electronic devices means connecting wires and components, and even small changes were time-consuming hardware changes. Now a lot of electronics functions have moved to software, and changes are done in code.

Arduino is a genuinely interactive platform (not fake interactive like clicking dumb stuff on Web pages) that accepts different types of inputs, and supports all kinds of outputs: motion detector, touchpad, keyboard, audio signals, light, motors... if you can figure out how to connect it you can make it go. It's the ultimate low-cost "what-if" platform: What if I connect these things? What if I boost the power this high? What if I give it these instructions? Mr. Banzi calls it "the art of chance." Figure 1 shows an Arduino Uno; the Arduino boards contain a microprocessor and analog and digital inputs and outputs. There are several different Arduino boards.

You'll find a lot of great documentation online at Arduino and Adafruit Industries, and Mr. Banzi's book Getting Started With Arduino is a must-have.

Packrats Are Good

The world is over-full of useful garbage: circuit boards, speakers, motors, wiring, enclosures, video screens, you name it, our throwaway society is a do-it-yourselfer's paradise. With some basic skills and knowledge you can recycle and reuse all kinds of electronics components. Tons of devices get chucked into landfills because a five-cent part like a resistor or capacitor failed. As far as I'm concerned this is found money, and a great big wonderful playground. At the least having a box full of old stuff gives you a bunch of nothing-to-lose components for practice and experimentation.

The Arduino IDE

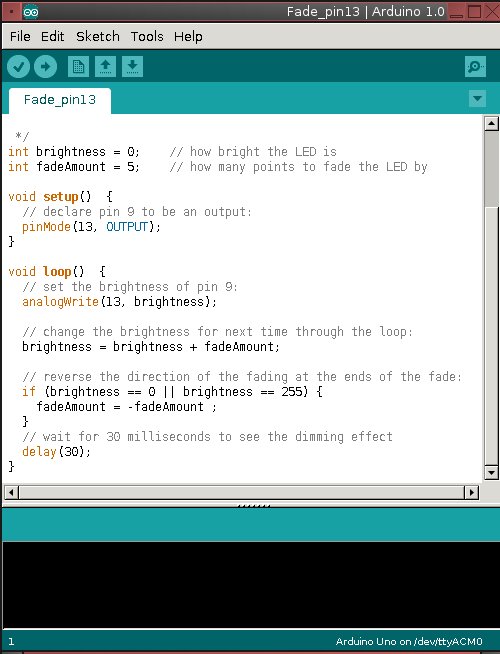
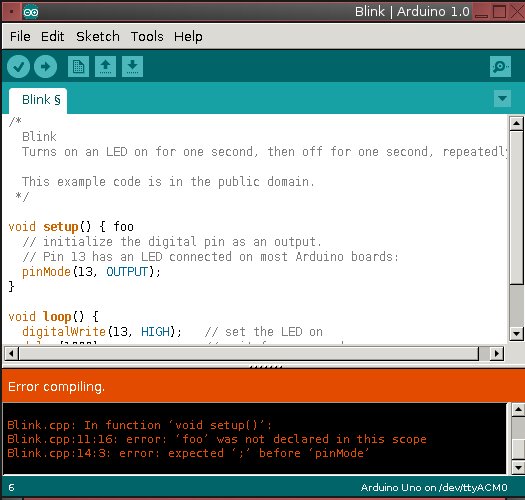
The Arduino integrated development environment (IDE) is a beautiful creation. The Arduino programming language is based on the Processing language, which was designed for creative projects. It looks a lot like C and C++. The IDE compiles and uploads your code to your Arduino board; it is fast and you can make and test a lot of changes in a short time. An Arduino program is called a sketch. See Installing Arduino on Linux for installation instructions.Figure 2: A sketch loaded into the Arduino IDE.

Hardware You Need

You will need to know how to solder. It's really not hard to learn how to do it the right way, and the Web is full of good video howtos. It just takes a little practice and decent tools. Get yourself a good variable-heat soldering iron and 60/40 rosin core lead solder, or 63/37. Don't use silver solder unless you know what you're doing, and lead-free solder is junk and won't work right. I use a Weller WLC100 40-Watt soldering station, and I love it. You're dealing with small, delicate components, not brazing plumbing joints, so having the right heat and a little finesse make all the difference.

Another good tool is a lighted magnifier. Don't be all proud and think your eyesight is too awesome for a little help; it's better to see what you're doing.

Adafruit industries sells all kinds of Arduino gear, and has a lot of great tutorials. I recommend starting with these hardware bundles because they come with enough parts for several projects:

Adafruit ARDX – v1.3 Experimentation Kit for Arduino This has an Arduino board, solderless breadboard, wires, resistors, blinky LEDs, USB cable, a little motor, experimenter's guide, and a bunch more goodies. $85.00.9-volt power supply. Seven bucks. You could use batteries, but batteries lose strength as they age, so you don't get a steady voltage.Tool kit that includes an adjustable-temperature soldering iron, digital multimeter, cutters and strippers, solder, vise, and a power supply. $100.

Other good accessories are an anti-static mat and a wrist grounding strap. These little electronics are pretty robust and don't seem bothered by static electricity, but it's cheap insurance in a high-static environment. Check out the Shields page for more neat stuff like the Wave audio shield for adding sound effects to an Arduino project, a touchscreen, a chip programmer, and LED matrix boards.

Essential Electric Terminology

Let's talk about volts (V), current (I), and resistance (r) because there is much confusion about these. Volts are measured in voltage, current is measured in amps, and resistance is measured in ohms. Electricity is often compared to water because they behave similarly: voltage is like water pressure, current is like flow rate, and resistance is akin to pipe diameter. If you increase the voltage you also increase current. A bigger pipe allows more current. If you decrease the pipe size then you increase resistance.

Figure 3: Circuit boards are cram-full of resistors. You will be using lots of resistors.Talk is cheap, so take a look at Figure 3. This is an old circuit board from a washing machine. See the stripey things? Those are resistors. All circuit boards have gobs of resistors, because these control how much current flows over each circuit. The power supply always pushes out more power than the individual circuits can handle, because it has to supply multiple circuits. So there are resistors on each circuit to throttle down the current to where it can safely handle it.
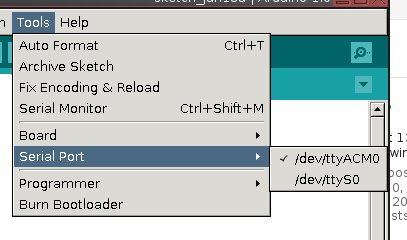
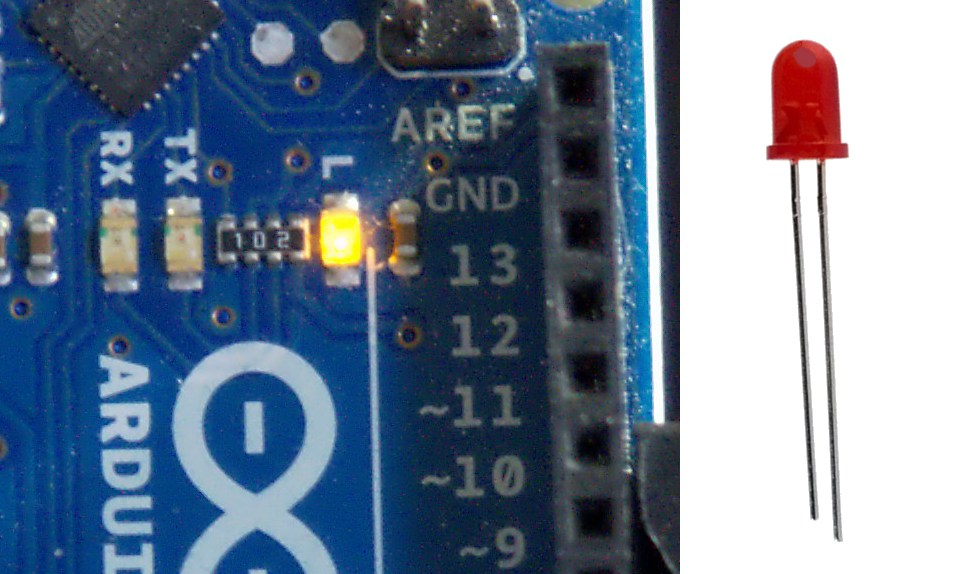
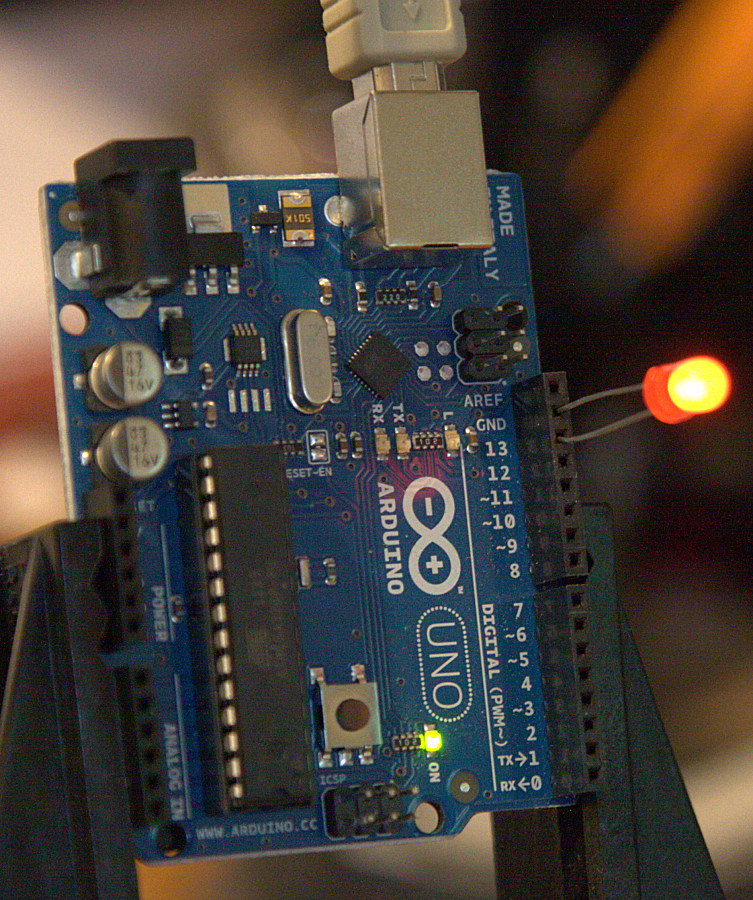
Again, there is a good water analogy — out here in my little piece of the world we use irrigation ditches. The output from the ditch is too much for a single row of plants, because its purpose is to supply multiple rows of plants with water. So we have systems of dams and diverters to restrict and guide the flow.

In your electronic adventures you're going to be calculating resistor sizes for your circuits, using the formula R (resistance) = V (voltage) / I (current). This is known as Ohm's Law, named for physicist Georg Ohm who figured out all kinds of neat things and described them in math for us to use. There are nice online calculators, so don't worry about getting it right all by yourself.

That's all for now. In the next tutorial, we'll learn about loading and editing sketches, and making your Arduino board do stuff.

]]>

Weekend Project: Loading Programs Into Arduino

In last week's Weekend Project, we learned what the Arduino platform is for, and what supplies and skills we need on our journey to becoming Arduino aces. Today we'll hook up an Arduino board and program it to do stuff without even having to know how to write code.

In last week's Weekend Project, we learned what the Arduino platform is for, and what supplies and skills we need on our journey to becoming Arduino aces. Today we'll hook up an Arduino board and program it to do stuff without even having to know how to write code.

Advice From A Guru

Excellent reader C.R. Bryan III (C.R. for short) sent me a ton of good feedback on part 1, Weekend Project: Learning Ins and Outs of Arduino. Here are some selected nuggets:


Solder: 63/37 is better, especially for beginning assemblers, because that alloy minimizes the paste phase, where the lead has chilled to solid but the tin hasn't, thus minimizing the chance of movement fracturing the cooling joint and causing a cold solder joint. I swear by Kester "44" brand solder as the best stuff for home assembly/rework.Wash hands after handling lead-bearing solder and before touching anything.Xuron Micro Shear make great flush cutters.Stripping down and re-using old electronic components is a worthy and useful skill, and rewards careful solder-sucking skills (melting and removing old solder). Use a metal-chambered spring-loaded solder sucker, and not the squeeze-bulb or cheapo plastic models.Solder and de-solder in a well-ventilated area. A good project for your new skills is to use an old computer power supply to run a little PC chassis fan on your electronics workbench.


Connecting the Arduino

Consult Installing Arduino on Linux for installation instructions, if you haven't already installed it. Your Linux distribution might already include the Arduino IDE; for example, Fedora, Debian, and Ubuntu all include the Arduino software, though Ubuntu is way behind and does not have the latest version, which is 1.0. It's no big deal to install it from sources, just follow the instructions for your distribution.

Now let's hook it up to a PC so we can program it. One of my favorite Arduino features is it connects to a PC via USB instead of a serial port, as so many embedded widgets do. The Arduino can draw its power from the USB port, if you're using a fully-powered port and not an unpowered shared hub. It also runs from an external power supply like a 9V AC-to-DC power plug with a 2.1mm barrel plug, and a positive tip.

Let's talk about power supplies for a moment. A nice universal AC-to-DC adapter like the Velleman Compact Universal DC Adapter Power Supply means you always have the right kind of power. This delivers 3-12 volts and comes with 8 different tips, and has adjustable polarity. An important attribute of any DC power supply is polarity. Some devices require a certain polarity (either positive or negative), and if you reverse it you can fry them. (I speak from sad experience.) Look on your power supply for one of the symbols in Figure 1 to determine its polarity.

Figure 1 shows how AC-to-DC power adapter polarity is indicated by these symbols. These refer to the tip of the output plug.

Getting back to the Arduino IDE: Go to Tools > Board and click on your board. Then in Tools > Serial Port select the correct TTY device. Sometimes it takes a few minutes for it to display the correct one, which is /dev/ttyACM0, as shown in Figure 2. This is the only part I ever have trouble with on new Arduino IDE installations.Figure 2

Figure 2: Selecting the /dev/ttyACM0 serial device.

Most Arduino boards have a built-in LED connected to digital output pin 13. But are we not nerds? Let's plug in our own external LED. Note how the LED leads are different lengths. Figure 3 shows how many Arduino boards have an onboard LED wired to pin 13. External LEDs have two leads, and one is longer than the other. The long lead is the anode, or positive lead, and the short lead is the cathode, or negative lead.Figure 3

Plug the anode into pin 13 and the cathode into the ground. Figure 4 shows the external LED in place and all lit up.

Loading a Sketch

The Arduino IDE comes with a big batch of example sketches. Arduino's "hello world"-type sketch is called Blink, and it makes an LED blink.Figure 4


/* Blink Turns on an LED on for one second, then off for one second, repeatedly. This example code is in the public domain. */void setup() { // initialize the digital pin as an output. // Pin 13 has an LED connected on most Arduino boards: pinMode(13, OUTPUT); }void loop() { digitalWrite(13, HIGH); // set the LED on delay(1000); // wait for a second digitalWrite(13, LOW); // set the LED off delay(1000); // wait for a second}

Open File > Examples > Basic > Blink. Click the Verify button to check syntax and compile the sketch. Just for fun, type in something random to create an error and then click Verify again. It should catch the error and tell you about it. Figure 5 shows what a syntax error in your code looks like when you click the Verify button.Figure 5

Remove your error and click the Upload button. (Any changes you make will not be saved unless you click File > Save.) This compiles and uploads the sketch to the Arduino. You'll see all the Arduino onboard LEDs blink, and then the red LED will start blinking in the pattern programmed by the sketch. If your Arduino has its own power, you can unplug the USB cable and it will keep blinking.

Editing a Sketch

Now it gets über-fun, because making and uploading code changes is so fast and easy you'll dance for joy. Change pin 13 to 12 in the sketch. Click Verify, and when that runs without errors click the Upload button. Move the LED's anode to pin 12. It should blink just like it did in pin 13.

Now let's change the blink duration to 3 seconds:


digitalWrite(13, HIGH); // set the LED on delay(3000); // wait for three seconds


Click Verify and Upload, and faster than you can say "Wow, that is fast" it's blinking in your new pattern. Watch your Arduino board when you click Upload, because you'll see the LEDs flash as it resets and loads the new sketch. Now make it blink in multiple durations, and note how I improved the comments:


void loop() { digitalWrite(13, HIGH); // set the LED on delay(3000); // on for three seconds digitalWrite(13, LOW); // set the LED off delay(1000); // off for a second digitalWrite(13, HIGH); // set the LED on delay(500); // on for a half second digitalWrite(13, LOW); // set the LED off delay(1000); // off for a second}


Always comment your code. You will forget what your awesome codes are supposed to do, and it helps you clarify your thinking when you write things down.

Now open a second sketch, File > Example > Basics > Fade.


/* Fade This example shows how to fade an LED on pin 9 using the analogWrite() function. This example code is in the public domain. */int brightness = 0; // how bright the LED isint fadeAmount = 5; // how many points to fade the LED byvoid setup() { // declare pin 9 to be an output: pinMode(9, OUTPUT);} void loop() { // set the brightness of pin 9: analogWrite(9, brightness); // change the brightness for next time through the loop: brightness = brightness + fadeAmount; // reverse the direction of the fading at the ends of the fade: if (brightness == 0 || brightness == 255) { fadeAmount = -fadeAmount ; } // wait for 30 milliseconds to see the dimming effect delay(30); }


Either move the anode of your LED to pin 9, or edit the sketch to use whatever pin you want to use. Click Verify and Upload, and your LED will fade in and out. Note how the Blink sketch is still open; you can open multiple sketches and quickly switch between them.

Now open File > Example > Basics > BareMinimum:


void setup() { // put your setup code here, to run once:}void loop() { // put your main code here, to run repeatedly: }


This doesn't do anything. It shows the minimum required elements of an Arduino sketch, the two functions setup() and loop(). The setup() function runs first and initializes variables, libraries, and pin modes. The loop() function is where the fun stuff happens, the blinky lights or motors or sensors or whatever it is you're doing with your Arduino.

You can go a long way without knowing much about coding, and you'll learn a lot from experimenting with the example sketches, but of course the more you know the more you can do. Visit the Arduino Learning page to get detailed information on Arduino's built-in functions and libraries, and to learn more about writing sketches. In our final part of this series we'll add a Wave audio shield and a sensor, and make a scare-kitty-off-the-kitchen-counter device.

]]>

Weekend Project: Take Control of Vim's Color Scheme

Vim's syntax highlighting and color schemes can be a blessing, or a curse, depending on how they're configured. If you're a Vim user, let's take a little time to explore how you can make the most of Vim's color schemes.

Vim's syntax highlighting and color schemes can be a blessing, or a curse, depending on how they're configured. If you're a Vim user, let's take a little time to explore how you can make the most of Vim's color schemes.

One of the things that I love about Vim is syntax highlighting. I spend a lot of time working with HTML, for instance, and the syntax highlighting makes it much easier to spot errors. However, there's times when the default Vim colors and the default terminal colors don't play well with one another.

Consider Figure 1, which shows Vim's default highlighting with the default colors in Xfce's Terminal Emulator. Ouch. The comments are in a dark blue and the background is black. You can sort of read it, but just barely.

So what we'll cover here is how to switch between Vim's native color schemes, and how to modify color schemes.

Installing Vim Full

Before we get started, you'll need to make sure that you install the full Vim package rather than the vim-tiny that many distributions ship by default. The reason that many distributions ship a smaller Vim package is that the vim-tiny package has enough of Vim for vi-compatibility for system administration (if necessary), but it saves space for the users who aren't going to be editing with Vim all the time.

Odds are, if you're using Vim regularly enough to care about the color schemes, you've done this already. If you're on Ubuntu, Linux Mint, etc. then you can grab the proper Vim package with sudo apt-get install vim.

Changing Vim Colors

Before we go trying to edit color schemes, let's just try some of Vim's default schemes. You may not know this, but you can rotate through a bunch of default schemes using the :color command. Make sure you're out of insert mode (hit Esc) and then type the :color command but hit the Tab button instead of Enter.

You should see :color blue. If you hit Tab again, you should see :color darkblue. Find a color you think might work for you and hit Enter. Boom! You've got a whole new color scheme.

For the record, I find that the "elflord" color scheme works pretty well in a dark terminal. If your terminal is set to a white background, I like the default scheme or "evening" scheme. (The evening scheme sets a dark background anyway, though.)

Where Colors Live

On Linux Mint, Debian, etc. you'll find the color schemes under /usr/share/vim/vimNN/colors. (Where NN is the version number of Vim, like vim72 or whatever.) But you can also store new color schemes under ~/.vim/colors. So if you find something like the Wombat color scheme you can plop that in.

You might also want to take a look at the Vivify tool, which helps you modify color schemes and see the effects. Then you can download the file and create your own scheme.vim.

Now, if you don't want to be setting the color scheme every single time you open Vim, you just need to add this to your ~/.vimrc:

colorscheme oceandeep

It's just that easy.

If you want to create your own color scheme, I recommend using something like Vivify. The actual color scheme files can be very tedious to edit.

]]>